WP User in SQL Command Line
Add WP Admin User in MySQL
In this post I am going to give a general overview of the process for accessing, reading and amending an SQL or MariaDB database using the MySQL command line in Linux.
We will be working with a fresh install of WordPress on a LAMP stack (Apache2) localhost, running on a Raspberry Pi 3B and the objective of the database update is simply to add a new user with full admin rights and privileges. We will also take a look at how to edit an existing database entry.
Please note – for the sake of simplicity, I have set my WordPress table prefix to (wp_) though for security reasons this should always be changed in a real production scenario. I typically tend to use 4 random characters. The prefix is set in the config.php file.
Moving swiftly on to the task in hand….
This article will also assume that we have already installed and configured our MySQL (MariaDB) database with an Apache server and PHP.
Note that I have included the Linux and MySQL command line prompts for clarity. These are :~$ = home directory, MariaDB [(none)]> = logged in to MySQL (Maria) server no database selected, and MariaDB [wp7]> in database server and using wp7 database.
Please only copy the commands in blue if you want to use these in your own command line.
Set up database – recap
Before we installed WordPress we created a database user, password, and then the (wp7) database itself… here is a quick recap: –
Log in to database server: –
:~$ mysql -u [user-name] -p'password'
Create a new database called ‘wp7’
MariaDB [(none)]> CREATE DATABASE wp7;
After this we installed WordPress in the server root and added the wp7 database credentials (name, user, pass) to the wp-config.php file
Next, lets return to the SQL server and see what databases are installed
MariaDB [(none)]> SHOW DATABASES;
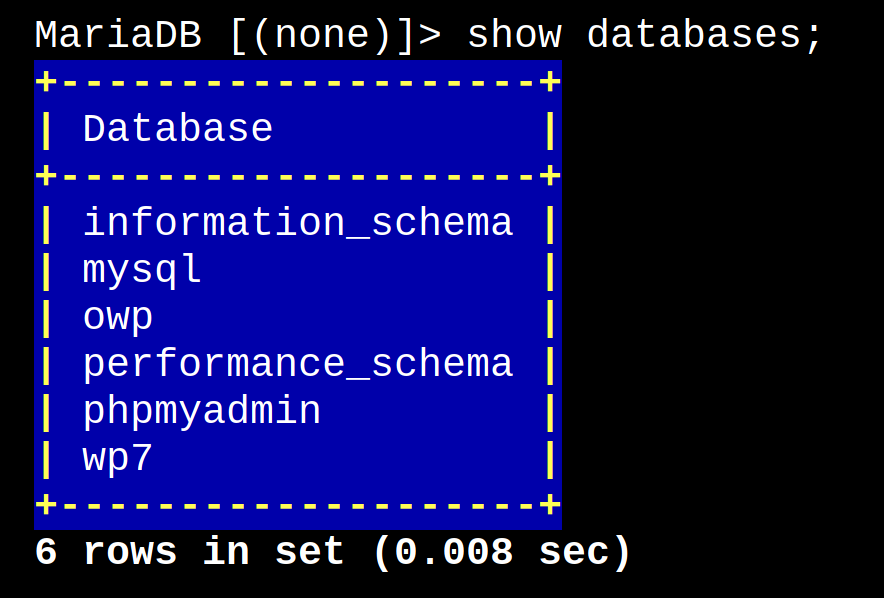
We can now see a list of all the databases in the server but we are only interested in ‘wp7’ which will now hold all of the tables for our WP installation.
Switch to the WP Database
In order to examine a database we need to switch to that database like this
MariaDB [(none)]> USE wp7;
Notice how the command prompt changes to show that we are in the wp7 database.
Now we want to see all of the tables in this database – we use the following command
MariaDB [wp7]> SHOW TABLES;

We are interested in the wp_users table which holds general info about registered users.
Let’s have a deeper look at that table
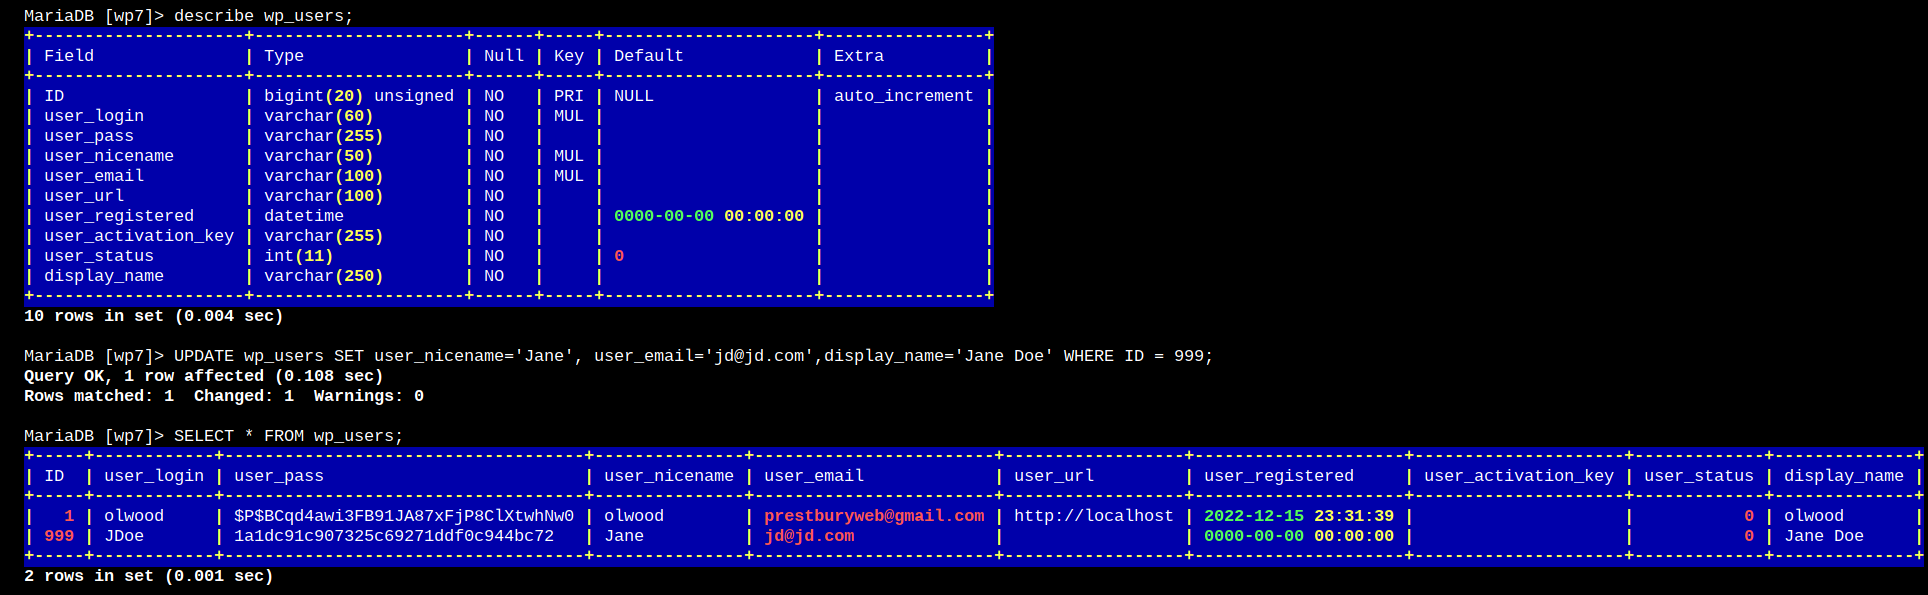
MariaDB [wp7]> DESCRIBE wp_users;
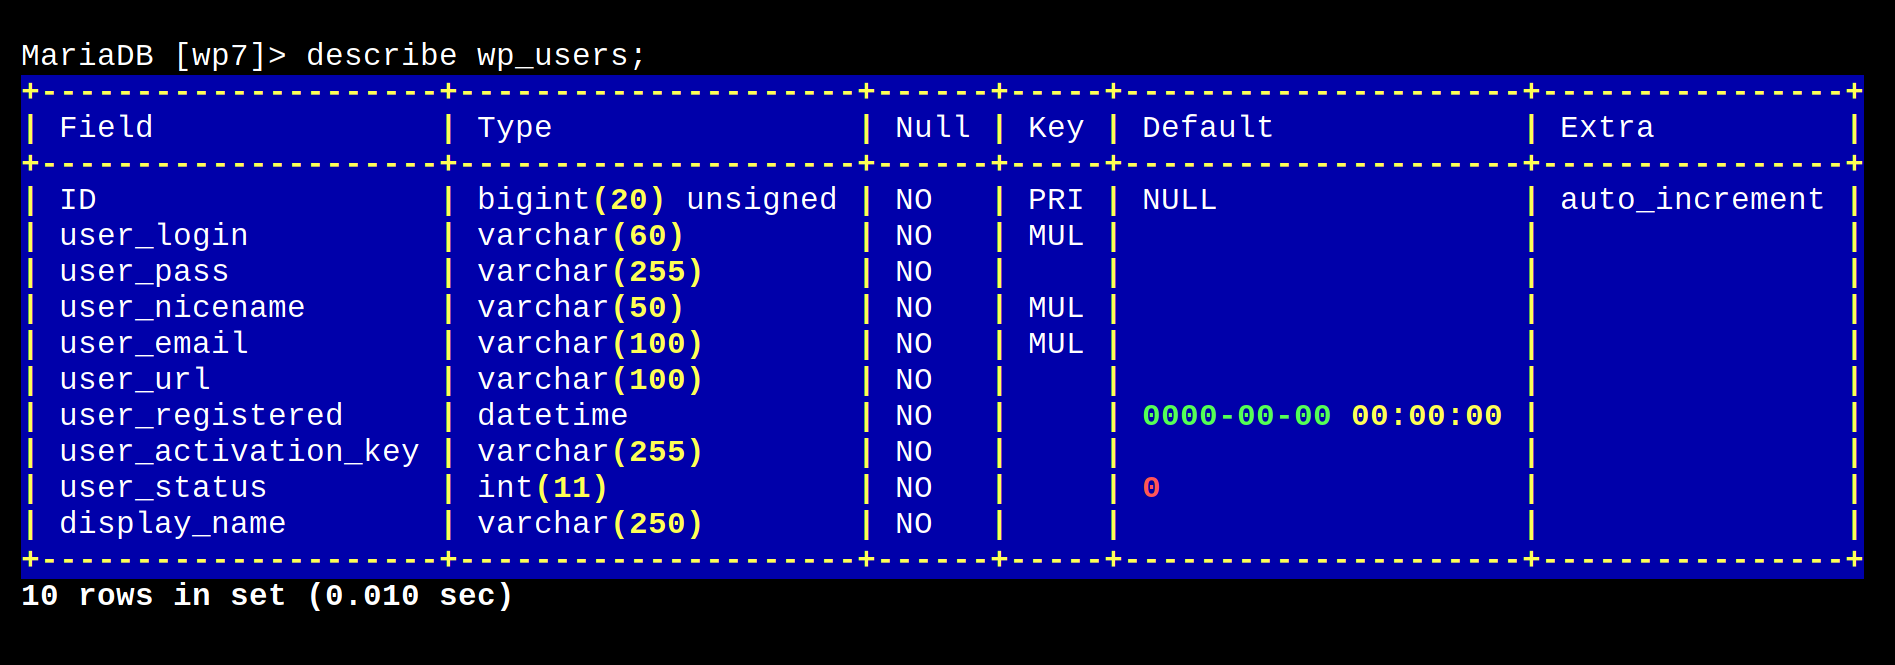
Now we can see all of the table columns and what kind of info they will contain.
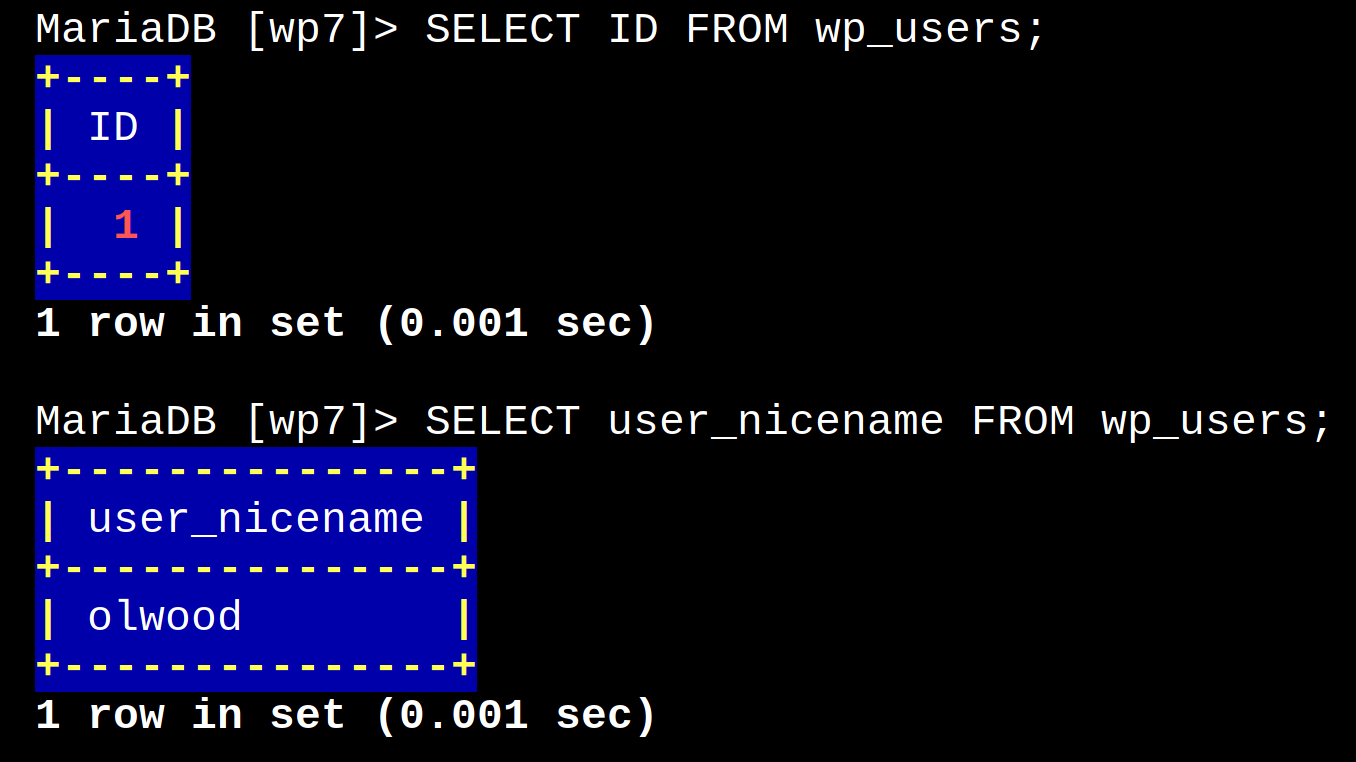
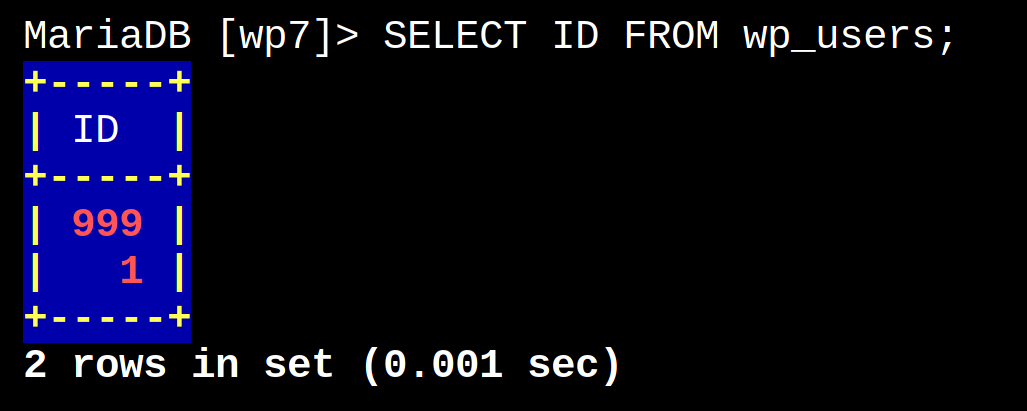
Let’s have a look at the ID and user_nicename columns – there is only me at this time:-
MariaDB [wp7]> SELECT ID FROM wp_users;
MariaDB [wp7]> SELECT user_nicename FROM wp_users;
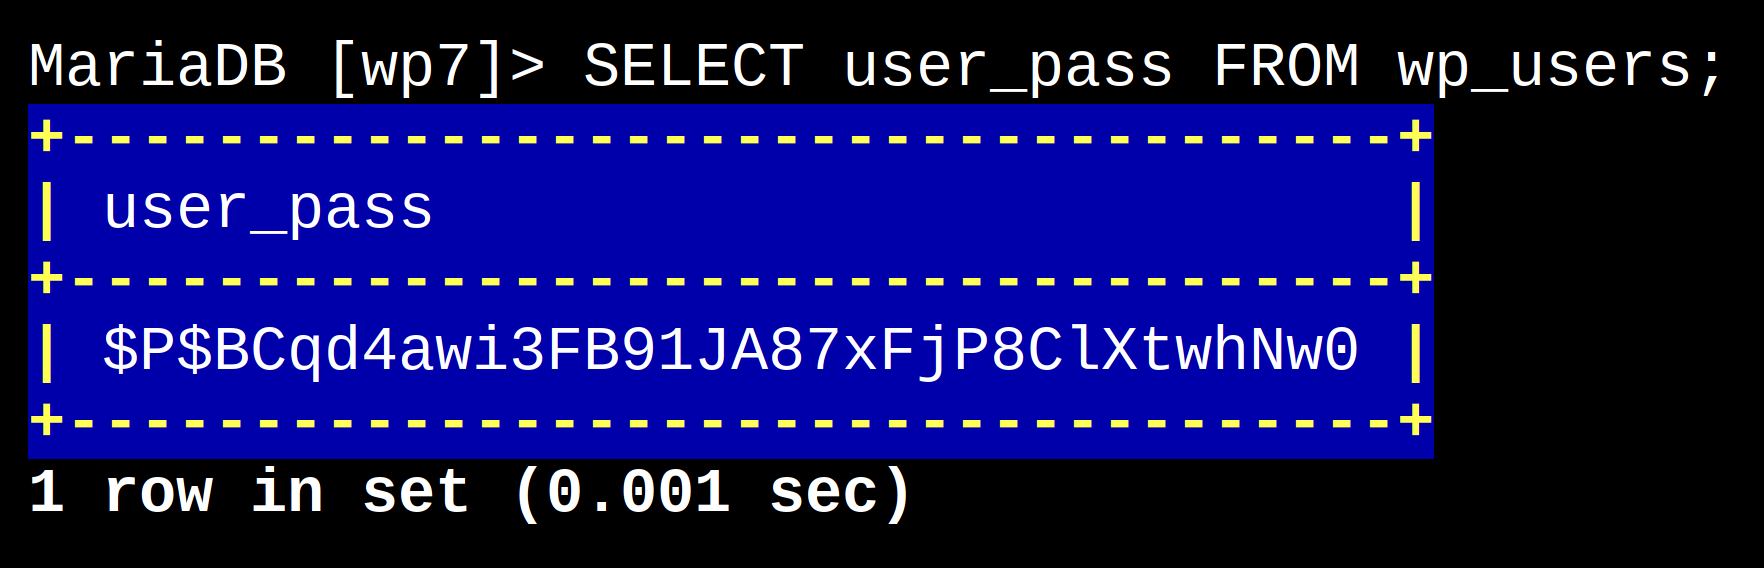
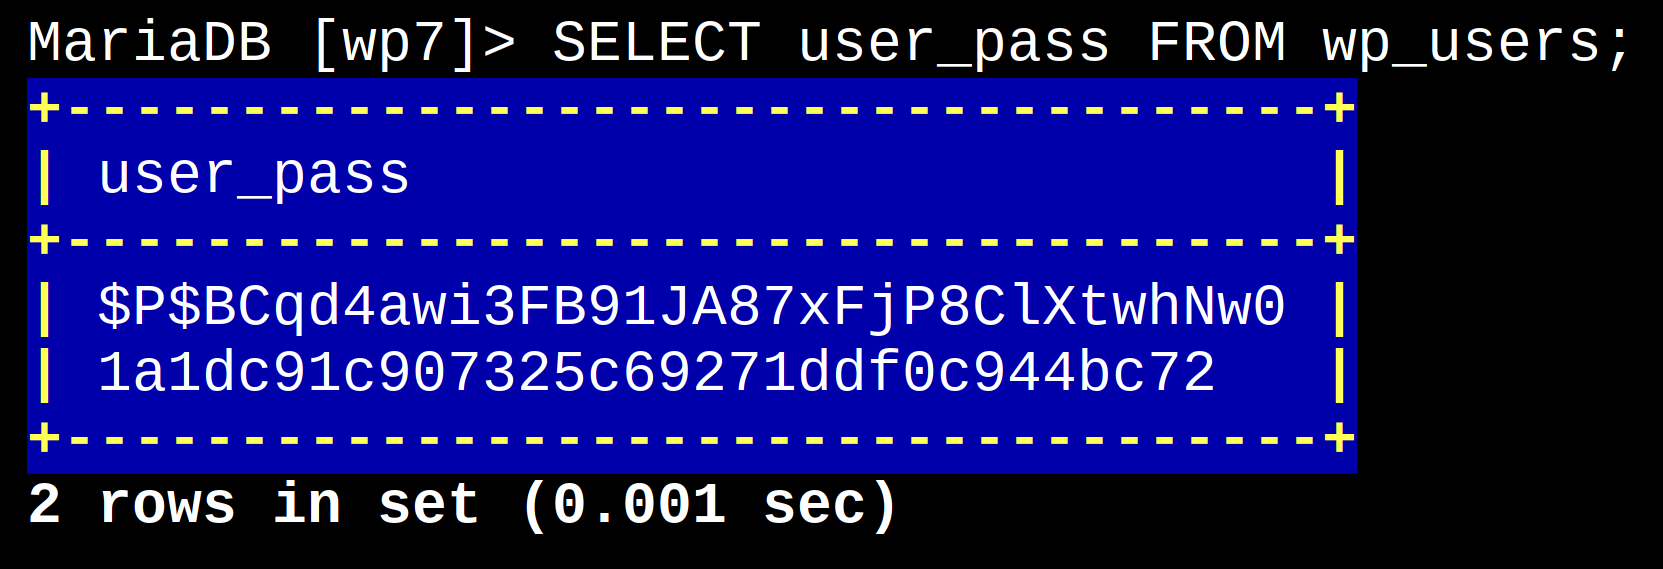
Lets have a look at user_pass; yes, this is where all the user passwords are held though they are encrypted as MD5 checksums – more on this later.
MariaDB [wp7]> SELECT user_pass FROM wp_users;
The only other really important fields are user_login and user_status. As I was the first registered user my ID is 1 and with full access privileges so my user_status is ‘0’. More about this when we move on to the second stage and work with the wp_usermeta table.
Adding a New User
There are two stages to this process. First we will work with the wp_users table then we need to add a few items to the wp_usermeta table. Our new user is called Jane Doe.
First, a quick note about syntax:
In Linux terminal or BASH shell script we use \ for line-break and -> for new line. I have written the commands in line-break format so they fit more neatly into small screens.
To add anything to a MySQL database we use the INSERT INTO command. The syntax for multiple columns in a row is as follows:-
MariaDB [wp7]> INSERT INTO \
-> ‵database-name‵.‵table-name‵ \
-> (‵col1‵, \
-> ‵col2‵, \
-> ‵col3‵) \
-> VALUES \
-> ('value 1', \
-> 'value 2', \
-> 'value 3');
Look closely at the punctuation, the first items in parenthesis are sometimes known as ‘selectors’ the second items are actual ‘values’ notice how the selectors are wrapped in ‘back-ticks’ ( ‵ ) this is a character that you will find (usually) at the top left of a UK keyboard. The values are wrapped in standard apostrophes. The values relate to the selectors in the first set of parentheses so if col 1 is user_login then value 1 is the desired user name or the value for user_login.
If you are already logged in to the general database in which the table to be modified is contained (wp7 in our case) then it is not necessary to include the (‵database-name‵.).
So lets get on with adding Jane Doe to our users – we are already logged in to wp7
MariaDB [wp7]> INSERT INTO \
-> ‵wp_users‵ \
-> (‵ID‵,\
-> ‵user_login‵,\
-> ‵user_pass‵,\
-> ‵user_status‵) \
-> VALUES \
-> ('999',\
-> 'JDoe', \
-> MD5('pass'), \
-> '0');
Here we are giving Jane Doe a user ID of 999 (it is important to set this high to avoid conflicts), her user name or user_login will be JDoe. Next we add the password which is just ‘pass’ in this case – I know, ridiculous right? Notice how this is formatted, the MD5 is telling WordPress to encrypt the password into an MD5 checksum — this is very important. And lastly, we have set her user_status to ‘0’.
So now if we look at the ID column we will see Jane’s ID of 999 added to the list and if we look at user_pass we can see her encrypted password
The new user entries at a glance; use the (*) wild card to see all data in the row:-
MariaDB [wp7]> SELECT * FROM wp_users;

Notice in the above line that we have not yet added data for all columns in the wp_users table – we are going to add those next.
Updating a Row
Previously, we didn’t add Jane’s ‘nice name’ (user friendly version of someone’s name) or email address and display name for the WP dashboard, so lets add those to Jane’s row.
This time we use the UPDATE command and add in the new values like this – notice how the line to be updated is also identified by the ID we gave Jane at the beginning (999).
MariaDB [wp7]> UPDATE wp_users \
-> SET user_nicename=’Jane’, \
-> user_email=’jd@jd.com’, \
-> display_name=’Jane Doe’ \
-> WHERE ID = 999;
The result in the database
So now we have created our new user Jane Doe but she still hasn’t had her login fully activated for admin use. If she was to login to the WP dashboard at this stage she would only be able to see the front-end of the site.
The next stage involves adding values into the wp_usermeta table. This tells WordPress more about Jane’s status and permissions as a user and we are going to give her full admin rights. This will give Jane the ability to access and change anything on the WP installation.
The wp_usermeta Table
This is the final stage of adding a new user to WordPress. Here we will set some parameters that will allow Jane to have full access rights to the WP dashboard or ‘back-end’.
First lets have a look at the wp_usermeta table
MariaDB [wp7]> DESCRIBE wp_usermeta;
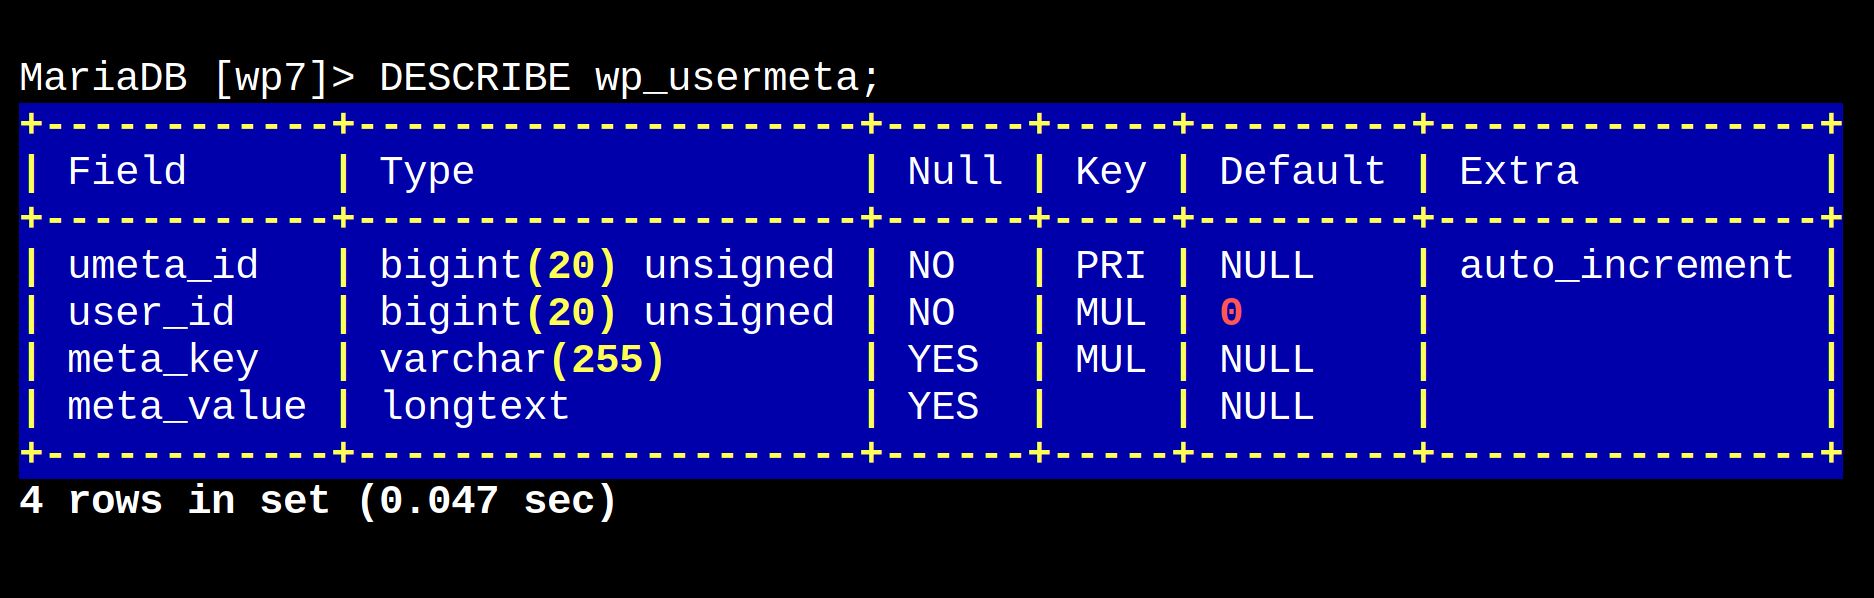
You can see that the usermeta table row has only 4 columns: umeta_id, user_id, meta_key and meta_value
As before we are going to use the INSERT INTO command to add Jane’s settings to the database
MariaDB [wp7]> INSERT INTO ‵wp_usermeta‵ \
-> (‵umeta_id‵, \
-> ‵user_id‵, \
-> ‵meta_key‵, \
-> ‵meta_value‵) \
-> VALUES \
-> ('NULL', \
-> '999', \
-> 'wp_capabilities', \
-> 'a:1:{s:13:”administrator”;b:1;}');
we set umeta_id to NULL as this is a value that will be automatically incremented by WP, user_id is the ID that we gave Jane at the beginning (999) the meta_key value is always ‘wp_capabilities’ and lastly this long and complex entry for meta_value is what sets Jane’s account to an admin, we enter ‘a:1:{s:13:”administrator”;b:1;}’
Now when Jane logs in to the WP dashboard she will see the full control panel.
Lastly, it is very simple to remove a user, or any line of data from a MySQL database … be careful. After all this hard work we can remove Jane from the database simply by issuing the following commands: –
MariaDB [wp7]> DELETE FROM wp_users WHERE ID=999;
MariaDB [wp7]> DELETE FROM wp_usermeta WHERE user_id=999;
Now all of Jane’s access right to WP will be removed.
If you would like to know more about the WP database and get a more detailed explanation of its many features then head over to the WordPress codex for more info.
« WordPress Global & Classic Theme Styles | Bashrc Linux – a guide »
Prestburyweb